Versions Compared

Key

  • This line was added.
  • This line was removed.
  • Formatting was changed.

Goals:

  • Walk through a options navigating within a Jupyter Notebook session

  • Demonstrate options and features available in Jupyter Notebooks

...

Table of Contents
minLevel1
maxLevel3
outlinefalse
stylenone
typelist
printabletrue

...

Initial Screen Navigation and Options

Active Work Area

Whatever you’re currently working on

  • Shown below the drop down menu

  • Usually this is a Jupyter Notebook

  • At default start, shows file and run tabs

...

Opening a New Blank Notebook

...

From the Dropdown:

File->New->Notebook

...

From the Right side of the File Management Tab:

New->Notebook

...

Upon connecting, you are presented

with a simple Jupyter Notebook screen and just a few options:
  • Drop down menu bar along the top

  • Active work area:

    • When you into the cluster for the first time, this area will display the default, which initially shows 2 tabs:

      • File Browser

      • Run Manager


Image Removed

Drop-Down Menu Bar

...

  • File: actions related to files and folders

  • View: actions that alter the appearance of Jupyter Notebook

  • Settings: common settings

  • Help: a list of Jupyter Notebook and kernel help links

...

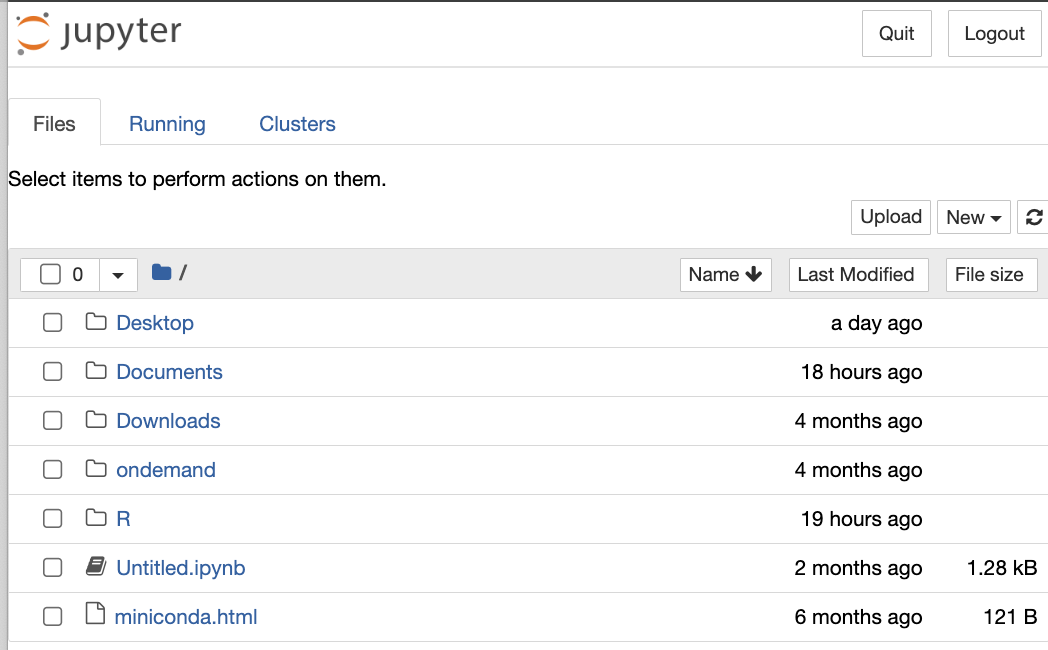
the jupyter dashboard which serves as your home page for jupyter notebook. The Jupyter Notebook screen is rather simple with 3 tabs:

  • Files: (Default selected) Interactive view of the portion of the filesystem accessible by the user, rooted by the directory in which the notebook was launched from.

  • Running: Displays currently running notebooks known to the server. (You can manage notebook kernels from here)

Image Added

...

What are Kernels?

A Jupyter kernel is the computational engine behind the code execution in Jupyter notebooks.

Most users think of this as the “compiler” or programming language used when running code cells.
The Kernel empowers you to execute code in different programming languages like Python, R, or Julia or others other languages and instantly view the outcomes within the notebook interface.

After opening

Once you open a new notebook, you

will

may be prompted to select a kernel

  • If you have never created a kernel to use, you will only see a list of default Jupyter kernels available on the cluster

  • You may check the box to start with the preferred kernel every time you open a notebook

Image Modified

Default Kernels on ARCC HPC Resources currently include:

  • Python Kernels

  • R Kernels

HPC-wide kernels are titled by packages installed and available when launched

Users can also create user-defined kernels from conda environments (Covered in a subsequent module. See

Creating

: Launching Jupyter Kernels from Conda Environments)

Image Added

...

Open a New Blank Notebook

From the Right side of the File Management Tab:

New->Notebook-> Select from a list of kernels. Choose Python 3 (ipykernel)

Image RemovedImage Removed

...

This should open a new browser tab/window with a blank Jupyter notebook named: Untitled.ipynb

If we go back to our previous Jupyter tab/window containing the file browser from which we launched our notebook, this new file shows up in the list, and has a green icon to it’s left, meaning it is currently running:

Image Added
chooseipykernel.pngImage Added

...

New Notebook - New Options

When a notebook is open a new browser tab is created showing the notebook user interface (UI).
This allows for interactive editing and running of the notebook document.

  • Header: Top has the document name (editable).

  • Menu bar with drop-downs & loaded kernel

  • Toolbar

  • Body

Highlight Header.pngImage Added

...

Menu Bar with Dropdowns

  • Has top-level menus that expose actions available in Jupyter Notebook:

    • File: actions related to files and folders

    • Edit: actions related to editing notebooks

    • View: Options to alter appearance of Notebook

    • Insert: Limited options for cell insertion

    • Kernel: actions for kernel management

    • Help: a list of Jupyter help links

Note: Jupyter extensions can create new top-level menus in the menu bar.
Highlight Menu Bar and drop downs.pngImage Added

Right of the menu bar, the current kernel is listed

Image Added

...

Toolbar Actions

Image Added - Save and checkpoint notebook
Image Added - Add a cell below the current one
Image Added - Cut/Delete this cell
Image Added - Copy contents of current cell
Image Added - Paste in new cell below active cell
Image Added - Up 1 cell
Image Added - Down 1 cell
Image Added - Run current cell
Image Added - Stop running cell
Image Added - **Reload/Restart Kernel
Image Added - **Restart Kernel & Re-run entire notebook
Image Added - Select current cell type
Image Added - Display full list of keyboard shortcuts for Jupyter Notebooks

** - Will restart entire kernel and you will lose all current output. (Is output easily regenerable?)

Highlight Toolbar.pngImage Added

...

Notebook Cell Types

We can use the cell type option in the toolbar to set cell type in the notebook body:

  • Code: Define computational code (language = from kernel) in the document.

    • If the kernel is python cell type, the cell will expect input in the form of python code.

    • This is our default code type when new cells are created.

  • Markdown: Uses Markdown language to build nicely formatted narratives around the code in the rest of the document. Click here for Markdown Cheat Sheet

  • Raw NBconvert: Used when text should be kept in raw form for conversion to another format (such as HTML or Latex). When you use these, cells marked as Raw are converted in a way specific to your targeted output format.

  • Heading: For making headings. Somewhat redundant - you can also make headings in a markdown cell.

Image Added

...

Code

  • Code cells allow you to write and run programming code in a language of your choosing (e.g., Python)

  • Languages supported in Jupyter include Python, R, Julia, and many others

  • On ARCC HPC resources, we support jupyter code in Python and R

  • After running, they can and usually do provide some form of output

Image Added

...

Markdown

  • Text Cells allowing you to write and render Markdown syntax

  • Where you describe and document your workflow

Image Added

...

Raw NBConvert

  • Stands for “Raw Notebook Convert”

  • Retains any text in these cells in their raw form and does not run them

  • Enables the conversion of your notebook to another format as given by the FORMAT string using Jinja templates.

    • Presenting: PDF

    • Publishing: LaTeX

    • Collaboration

    • Sharing: HTML

  • Setting to “none” just makes it a “Raw” cell in which nothing is run on it.

Image Added

...

Where are we?

Previously, we said the file management tab shows the filesystem accessible to the user, rooted by the directory from which the notebook was launched.

In the file management tab we can see root directory, and within it, the doc and ondemand folders.

We could just assume the file manager is showing our home directory. But how would we find out for certain?

files.pngImage Added

...

Running with a Python kernel, we can use our jupyter notebook to get this information from the system:

  1. import the python OS module (to let us interact with the native OS on the cluster that Jupyter is running on top of)

  2. On the next line, type os.getcwd() (AKA: get current working directory)

  3. Click the run button Image Added to run our cell and generate a new output cell, which also creates a new input cell below that.

Note: New input cells are code cell types by default
With the information from our output cell, we can conclude that OnDemand launches Jupyter from your $HOME
Image Added

import os : import a python module allowing us to use python kernel running this notebook to interact with underlying HPC cluster’s OS

os.getcwd(): A python command to output the full system path in which our active jupyter notebook resides.

...

Another way:

Running with a Python kernel, we can use our jupyter notebook to get this information from the system with ! implementation to run a command from the shell of the underlying system:

  1. !pwd

  2. Click the run button Image Added to run our cell and generate a new output cell, which also creates a new input cell below that.

Note: New input cells are code cell types by default
With the information from our output cell, we can conclude that OnDemand launches Jupyter from your $HOME
pwd.pngImage Added

! : Functionality from ipython kernel calling to the shell in a new process, and executing the shell command that follows it.

os.getcwd(): A python command to output the full system path in which our active jupyter notebook resides.

...

How to get to directories outside of $HOME?

If we select the default Python 3 (ipykernel), we are presented with the file explorer showing our home directory as it’s

root

rooted location. This means we can’t go up any further in system’s directory structure.

  • With our local root location for the notebook set to our $HOME, we are unable to see our /project and /gscratch directories on the cluster.

files.pngImage Added
  • To expose these folders to the jupyter environment, create a symbolic link (aka shortcut) within our /home.

A screenshot of a computer

Description automatically generatedImage Removed
  • Instructions for creating a symbolic link may be found here or expanded in the cell to the right

Expand
titleSteps to create a symbolic link
  1. Open an ssh connection to the HPC cluster with:
    ssh your_username@clustername.arcc.uwyo.edu
    or open a shell through OnDemand:

    Image Modified
  2. In the shell/terminal interface, create a symbolic link to your project (replacing project_name with the name of your project) with:

[~] ln -s /project/project_name/ project

  1. In the shell/terminal interface, create a symbolic link to your gscratch (replacing username with the your username on the HPC) with:

[~] ln -s /gscratch/username/ gscratch

What Packages are Available in our Kernel?

...

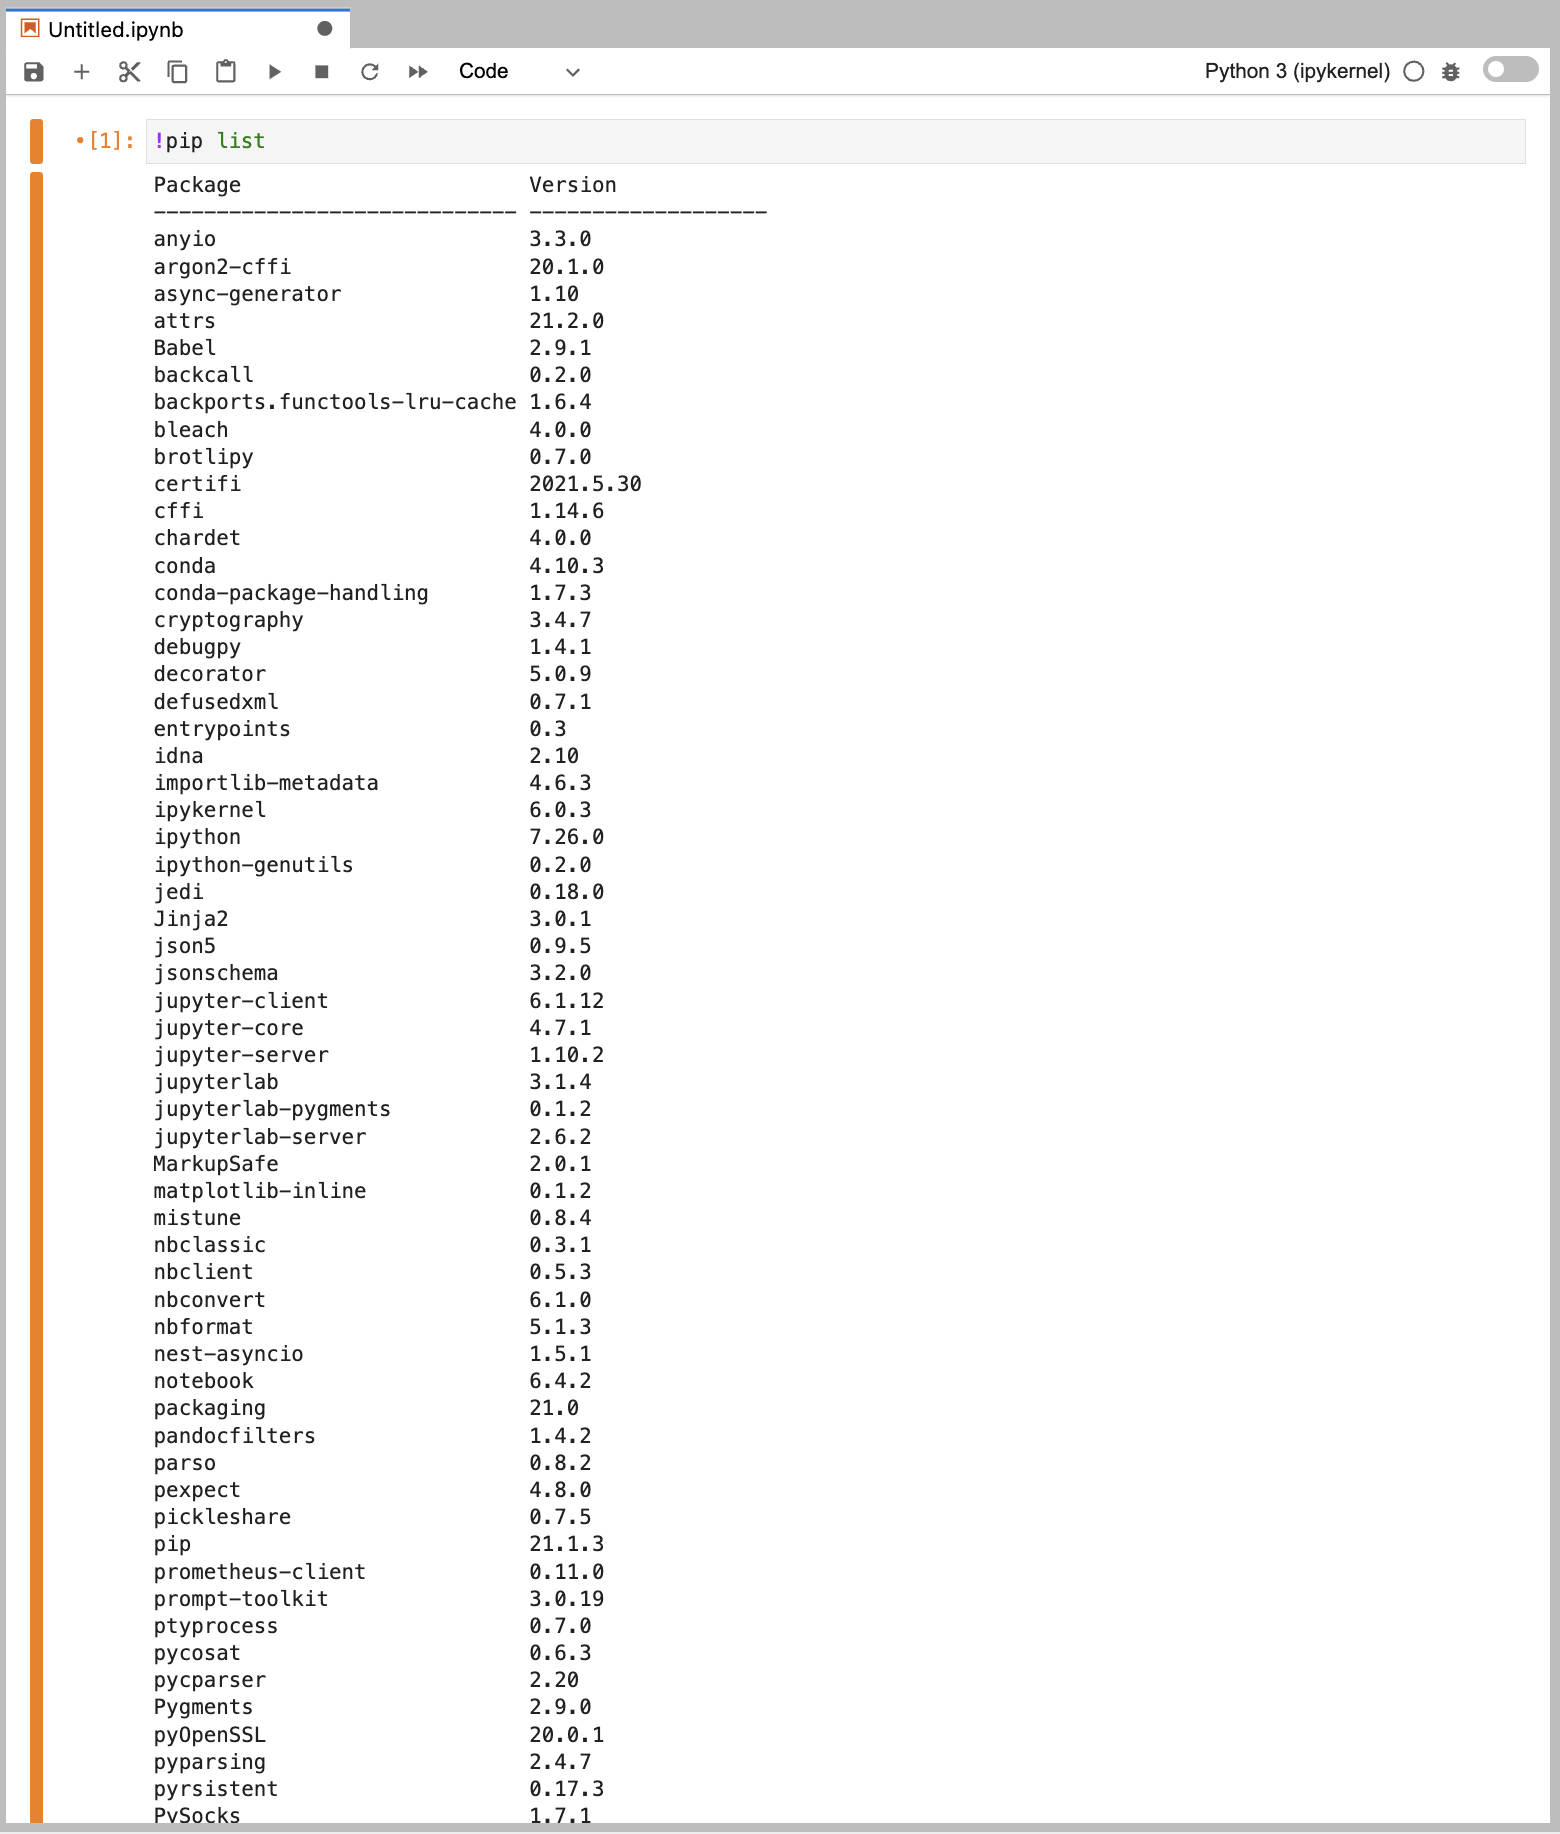
Or, lets get clever:

Alternatively, we can

write out a simple a python command that will list available packages:Image Removed

After writing this command, we hit the “play” button to run this cell:

list.pngImage Removed

Click on the package list image to the right to see output

At first glance, it looks rather comprehensive. We have a long list of software packages available to us.

Image Removed

New Cell in our Notebook

After running our last cell, a new cell is automatically created at the bottom extending our notebook

  • New empty cell is at the bottom.

  • Previous cell and output from that previous cell’s run is above our new cell

  • We can also manually create a new cell with the + button

In this cell, lets run another python command to import a common package used in mathematic and multi dimensional matrix computations - numpy.

...

Then run it like we did the last cell.

...

simplify things by create a symbolic link from within our notebook using ! functionality (if we’re running an ipython kernel):

Image Added

...

Can we get outside of home now?

We can see new links to our external directories:

updatedfiles.pngImage Added

And now we can get to them:

Image Added

...

Getting information about packages?

What’s Installed - How to find out:

In our notebook, we can see which modules are available by opening a new cell with the + button.

In our cell box, set as “code” use the python import command, followed by a space, then hit tab to get a list of options.

Hitting tab after import runs autocomplete options for the import command. This list of options has populated all modules available to us in our jupyter notebook:

Image Added

...

What’s Installed - Can we get a list in Python?

Yes. By running help('modules')
Note: the numpy library isn’t available

Image Added

...

What’s installed and how to use it: Python - help()

  • Generally, help ('modules <module_name>') will give us information on how to use the specific python library we’re importing as long as that library is installed.

  • Similar in functionality to the --help and man commands for shell.

...

What’s Installed - Can we get a list in R?

...

What’s Installed - Query a specific package in R?

...

What’s Installed and how to use it: In R - help()

...

We’ve confirmed the package we need is unavailable:

Our output results in an error:

Image Added
  • The error means this particular module is not available in the kernel we have loaded, despite being a commonly used software package

...

  • for researchers and computations.

  • While many packages were listed when we autocompleted an import command, most of them were installed as part of the jupyter installation and underlying OS environment.

  • Most software we’d need to perform even more simple and common activities for our research would still need to be installed or made available somehow. What are our options?

...

Option 1: Load a different kernel

Depending on the HPC’s native environment, you may have other kernels available.

Image Added

Or not --->

MedBow currently has a minimal number of global kernels (purposefully).

Image Added

...

If this were an option, we’d see it in our dropdown list of kernels and could select a different one:

  • Kernel option in our drop down menu then navigate to “Change kernel”.

  • Select a different kernel, based on your own preference

  • Example shows others available, but on MB they may not be.

...

Image Added

...

The new kernel is loaded as shown in the top right of our notebook.

  • If we rerun our 2 cells again, what happens this time?

Image Added
  • Depends on the kernel we loaded:

Image Added

...

No available kernels have all the software I need - Now what?

Partially covered in python and conda materials, but short answer:

Best practice - Do NOT install the software directly from your jupyter kernel

...

...


Doing so can and frequently does eventually result in:

...

To be continued…

...

Next Steps